Friday 18 September 2015

Gingersnap Biscuits

At the end of today I will have two whole weeks holiday.
YEE HAH!!!!
Well it will be holidays in so far as the alarms will be turned off.
What does holidays mean for me?
Well it means having to manage a business while having 5 kids at home.
That bit is hard. And not much of a holiday.
But - the not being woken by alarms is just about my favourite thing ever!
Now THAT is a holiday.

This holidays I am going to get a cooking roster on the go and allocate a day to each of the kids to cook dinner.
Well actually that was Mr Girlfriend's idea. He suggested they all use my recipe cards- WIN.
We'll see how that pans out.....

The other thing I am hoping to do more of is my Ceramics making.  I am hoping that my online store, so that you can purchase my wares, is not too far away. I have another batch of wares in the kiln today.
If you want to have a little peek at the kinds of things that I am making you can look here at my GG Clay adventures.
Watch this space!

I have already had the bigs home for this week- they have an a extra weeks holidays this term and oh boy do they need it. We/They have never been so busy in our whole life.
Taking a breather is oh so necessary.
So during the week there has been a lot of extra baking going on to cater for their ridiculously large appetites.
The lads love a good Choc Chip cookie- who doesn't?
But for me the winning biscuit is a good ol fashioned GINGERSNAP.
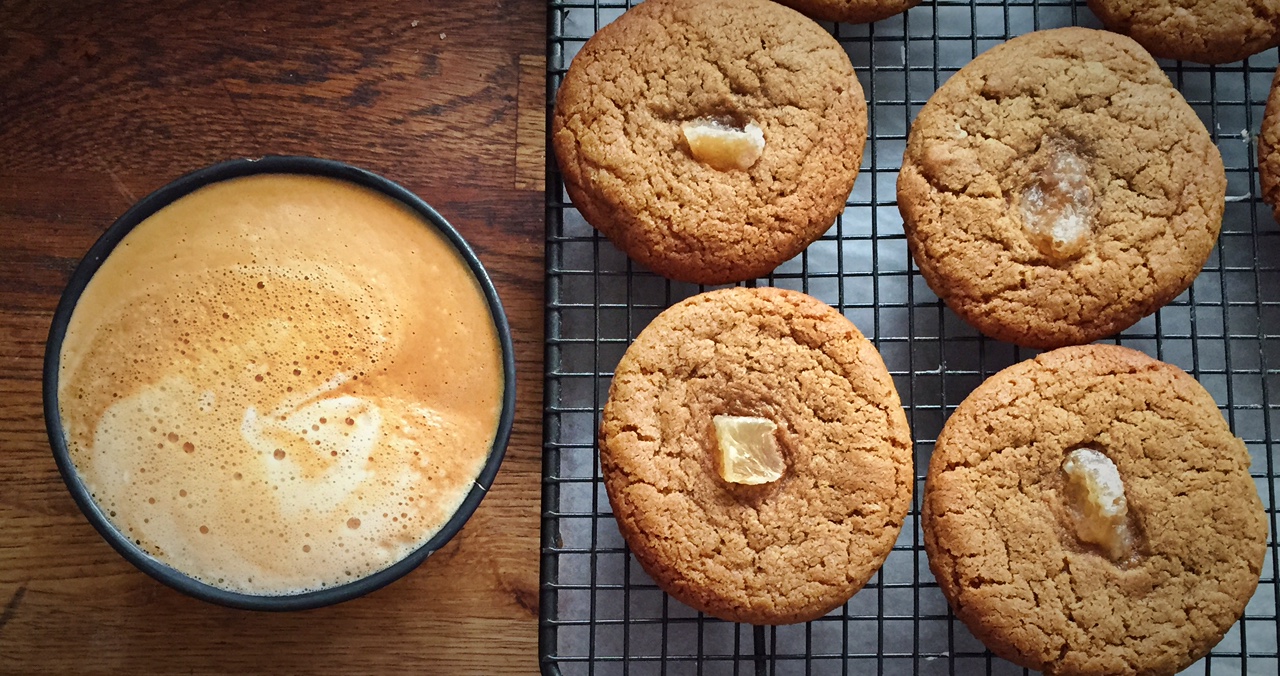
I love the tins of thin crunchy ones from Ikea but nothing beats a homemade one with a big chunk of real ginger dolloped in the centre.
I had a hankering yesterday and so it had to be.......


GINGERSNAP BISCUITS:
These are rich and delicious and with the addition of the big chunk of real ginger on top they are the ultimate Ginger biscuit.
Perfect with a large bowl of coffee. These are dangerously easy & delicious.

WHAT YOU WILL NEED:

  • 2 cups plain flour
  • 170g butter (melted)
  • 1 cup sugar
  • 1/4 cup treacle
  • 1 egg
  • 1 tablespoon powdered ginger
  • 1 tspn cinnamon
  • 2 tspns baking soda
  • chunks of candied ginger

METHOD:
Preheat oven to 175C.
Line a baking tray with baking paper.

Add all ingredients into a large mixing bowl and combine well.

Roll in your palm into ping pong size balls.
Place on baking tray and place a chunk of ginger into the centre.
Bake for 12 mins. 


Remove and let sit on tray for 5 minutes before moving to a cooling tray.


Wednesday 9 September 2015

Rosemary & Orange Syrup cake

Who doesn't love a syrup cake?

And I am a big fan of Rosemary and orange together.
Both Oranges and Rosemary are abundant in Winter.
I have made recipes with this marriage before.

Savoury & Sweet.
Heady with perfume and a little zing from the citrus. To me it is one of the perfect kitchen marriages.

The rosemary is in flower and it's fragrant lavender coloured blossom looks so beautiful against the deep Green.
Nature at it's best.

This cake is sticky, fragrant & absolutely delectable.


ROSEMARY & ORANGE SYRUP CAKE:
I make this cake in a slab so it can be cut into slice pieces.  You can easily substitute it into a regular cake tin if you like.
I like it as a slab so I can cut it into slice style pieces and wrap it nicely to give as little gifts.


What you will need:
  • 225g butter
  • zest of 2 large oranges
  • 230g caster sugar
  • 1 teaspoon vanilla extract
  • 3 eggs
  • 155g SR flour
  • 250g plain Greek style yoghurt
for the syrup:
  • juice of 2 oranges
  • 125ml water
  • 230g caster sugar
  • 2 large sprigs rosemary
  • zest of 2 oranges

METHOD:

Preheat oven to 180C.

Grease and line a 16x26cm baking tin.

Beat butter, orange zest & sugar until pale & creamy.
Add the eggs one at a time until combined.

Gently add the flour and yoghurt half at a time and beat until just combined.
Spread into the tin. Use a spatula to evenly spread it across the tin.
Place into oven for 30-35 minutes or until skewer comes out clean.

Meanwhile add all syrup ingredients into a small sauce pan and bring to a simmer, reduce and cook until thickened. Remove from heat and set aside.

Remove cake from oven and skewer small holes evenly across the top.  Pour syrup evenly across the cake and allow to sit for 20 minutes.
Remove cake from tin & slice into evenly sized rectangles.

Serve with a dollop of yoghurt - or wrap nicely to give as a gift to a friend you love.
xx


Monday 7 September 2015

Ham Hock & Chicken Terrine

Terrines are for me one of the most delightful things in the world.

What looks like a rectangular block of 'not much' when it first arrives at the table, is sliced to reveal the most glorious array of colours and textures within.
And oh my - the flavours!

A perfect picnic food. And one of those things that gets better after a day or two when the flavours are able to develop.

I love using Ham Hocks and often have at least one on my fridge.
I think most people use them only for soups but I like to use them in a few ways.
Slow roasting is a fave- leaving melt in your mouth chunks of delicious ham.

You may remember this recipe for Slow Braised Ham Hocks that became Ham Hock Hash.

Mmmmm porky goodness.


HAM HOCK & CHICKEN TERRINE:
This is a SUPER EASY recipe but requires a little planning ahead.
This terrine needs to be started the day ahead as it needs to set in the fridge overnight otherwise a very easy recipe.
I grind my own chicken (thigh meat) into mince by pulsing it-  I like to do this so the texture is not all the same, however using pre-minced  chicken is ok too.

WHAT YOU WILL NEED:

  • 1 braised ham hock, bone & skin removed & meat pulled off in chunks (follow this recipe to slow braise)
  • 500g chicken mince (see recipe notes above)
  • 1 cup frozen peas
  • 2 cloves garlic
  • 2 whole allspice
  • 1 heaped teaspoon fennel seeds
  • 1/2 cup roughly chopped parsley
  • 1 egg
    S & P
  • bacon rashers
METHOD:

Preheat oven to 180C.

Line a terrine dish with bacon rashers - leave some over hanging to fold over the top of your terrine.

Grind the allspice, fennel seeds & garlic in a mortar and pestle to a paste.
In a large bowl add the chicken mince, garlic paste, chopped parsley, peas, egg and the chunks of ham hock. Add a generous amount of S & P.
Mix together very well.

Now press down the meat mix into the terrine dish firmly and fold the rashers over the top and neatly tuck in.
Pop the lid on the terrine dish.
(If you don't have a terrine dish- a loaf tin will suffice and cover with alfoil )

Place the terrine dish into a deep roasting dish and pour enough boiling water in so that it comes about half way up the side of the Terrine dish.
Place into oven and bake for an hour.
Remove from oven and allow to cool in the dish.

Remove and pour out excess liquid.
Leave Terrine in the dish and cover with kitchen wrap.
Put some weight on to the terrine (I use a well wrapped brick as it fits perfectly!) and place into the refrigerator overnight.

Now unwrap and slice heartily!
Serve alongside some really good Sourdough, some zingy pickles and some extra tasty crumbly cheese.
Will keep for up to 4 days in the fridge- but ours never lasts that long!